JUGULAR FOR MIDEN
INSTRUCTIONS
Supported Formats
Mesh formats:
.fbx, .wrl (VRML V2), .dae (COLLADA), .obj, .stl, .3ds, .xgmml, etc…
Volume formats:
.nii (NIfTI), .hdr (NIfTI), .jpg (image stack), .png (image stack), .case (Ensight Gold), etc…
Point-cloud formats (as from LIDAR):
.las, .laz
Process
Create a mesh model, image stack, or point cloud in your favorite 3D software:
-
- Rhino, 3ds Max, Maya, Blender, CATIA, SolidWorks, SketchUp, Cytoscape, etc
Export geometry and material texture files in one of the supported formats.
Next you will need to access the Jugular software from any Visualization Studio workstation:
-
- Open the K: Workshops drive, and within the “Intro to Jugular” folder, copy the “Jugular” folder to your Documents folder.
(For your convenience, a “Project Template” folder is contained inside that you can copy, rename and modify for importing your custom content.) - Place the files exported from your software inside Jugular’s “data” folder: Jugular\ProjectTemplate\data\
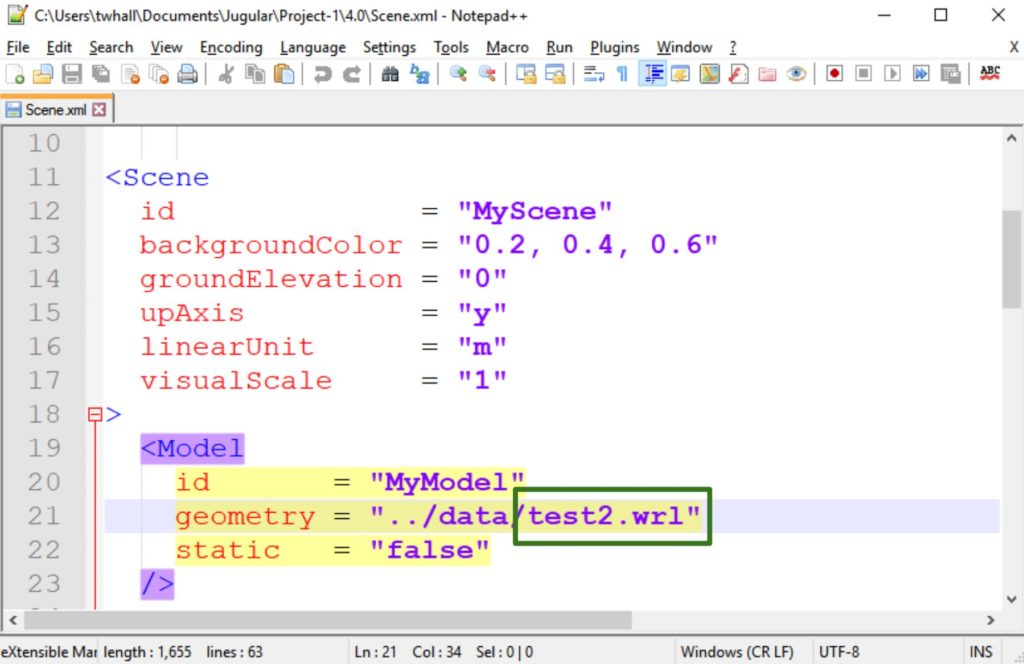
- Edit the Jugular config file (Jugular\ProjectTemplate\4.0\Scene.xml) contained in the Jugular folder using Notepad++ and add the name of your model file that is contained in the data folder by changing the “Geometry” attribute:
- Open the K: Workshops drive, and within the “Intro to Jugular” folder, copy the “Jugular” folder to your Documents folder.
-
- Save your changes to Scene.xml
Viewing Your Content in the MIDEN
Scenes prepared for Jugular can be previewed on an Oculus Rift prior to viewing in the MIDEN. Launch Jugular with your file loaded by clicking run_Desktop.bat contained in the Jugular folder. Jugular will launch in a CMD console prior to loading your scene, and display a copyright message. Press Y to agree and run; press N or Q to quit. If your scene looks correct, contact us to arrange a time to view your scene in the MIDEN.